Lesson 15: Drawing a ring
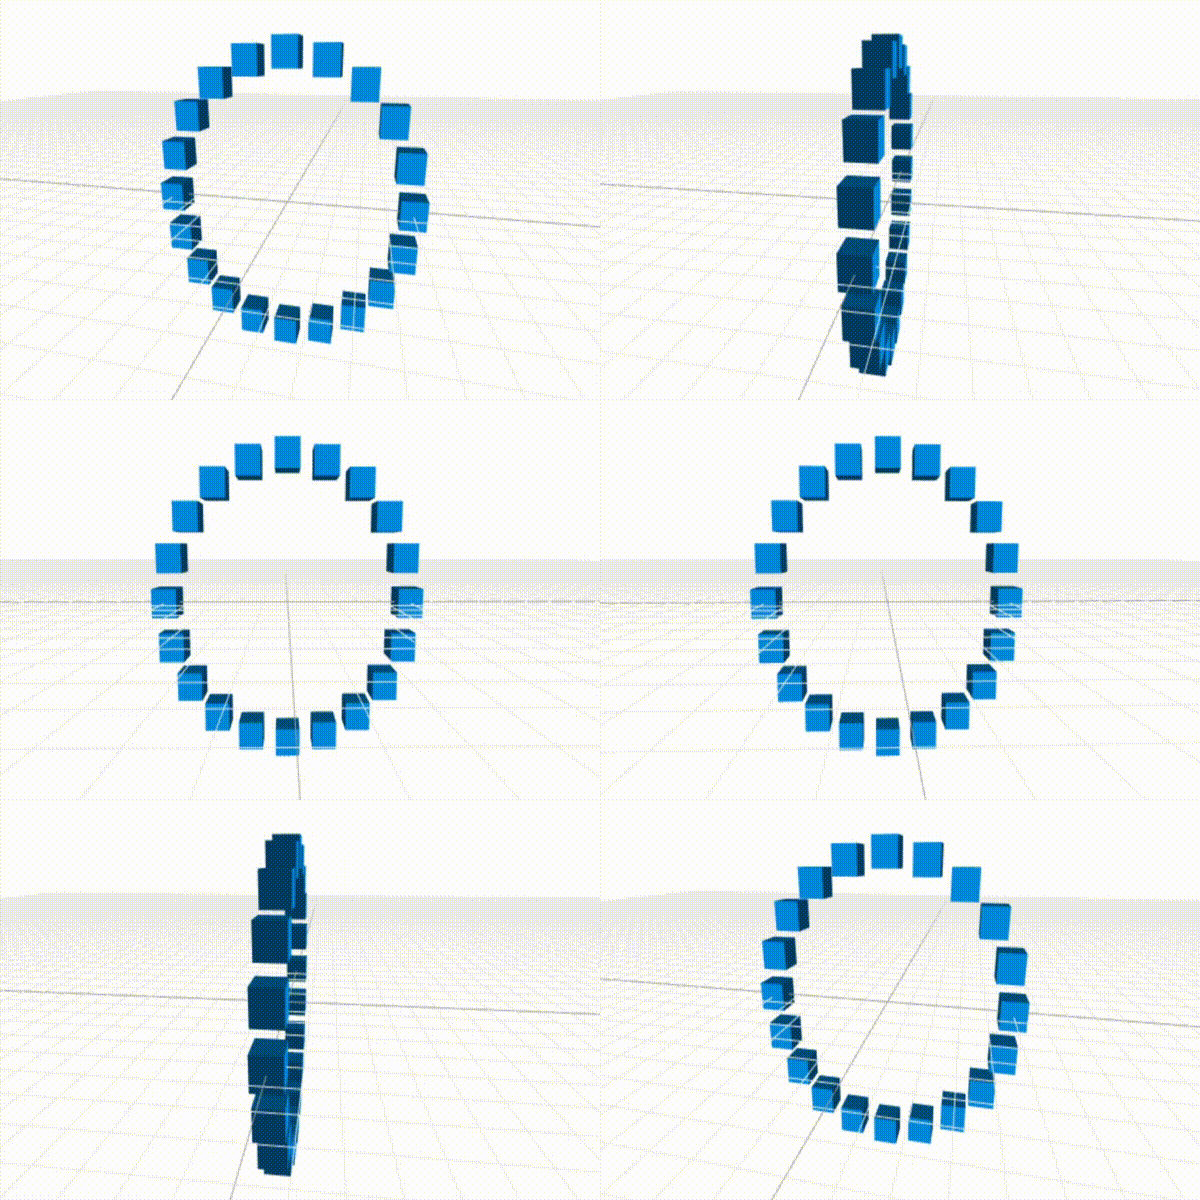
Now that we know how loops work, we can try to create the following ring structure. In future lessons, we'll build on this and produce more complex and awesome structures.

A math refresher first
Before we get started, we need to learn a bit of math. If you're mathematically inclined, feel free to skip this section.
Calculating the x and y coordinates of any given point in a circle

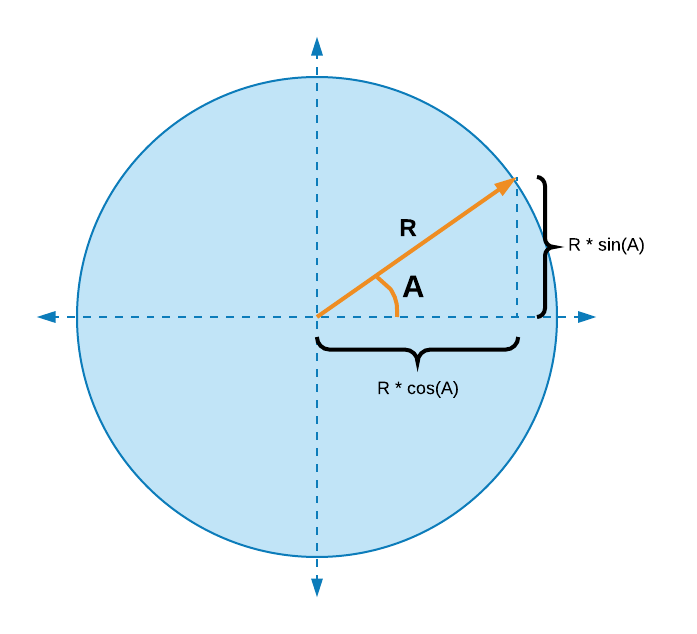
The diagram above illustrates how to calculate the x and y coordinates
of the point where the orange line intersects the circle. If the angle between
the orange line and the x axis is represented by A and the length of the
orange line is R (short for Radius of the circle), then the x coordinate
of that point is R * cos(A) and the y coordinate is R * sin(A).
Radians
One last thing you need to know about before we jump into the code:
radians. Angles can be measured in
either degrees or radians. As you may already know, a full circle is 360°. But a
full circle can also be expressed in terms of radians as 2π, where π
is approximately 3.1415.
For more details on both these concepts, check out this Khan Academy tutorial.
First attempt at a ring
With all the knowledge from the section above, we can create a simple ring:
Let's deconstruct this piece of code:
Python has a lot of useful mathematical functions in its
mathmodule. Instead of importing them directly usingfrom math import pi, cos, sin(which would also be a valid approach), we decided to import the entiremathmodule and just use selective parts of the module using themath.pisyntax. This is a useful pattern and worth remembering.We set
RADIUSandSEGMENTSas variables near the top of our code. UsingALL_CAPSto store common constant values is a popular pattern. It increases the readability of your code. It also makes it easy to modify the behavior of your code. Try changing the radius or the number of segments by adjusting those 2 variables and see how easily you can change your ring.We iterate over
range(SEGMENTS), meaning that we iterate over the list[0, 1, 2, 3, ..., (SEGMENTS-1)]. Each of those numbers represents a cube in the ring. We call this index ourposition.For each
positionindex, we calculate the number of radians from thexaxis. Think of the diagram above for this. The whole circle is2πradians. So the angle (in radians) of our point on the circle (corresponding to theposition) is the fractionposition/SEGMENTSof2π. That makes it2π * (position/SEGMENTS). In Python, the value of the constantπcan be found inmath.pi.The value of the
xcoordinate isRADIUS * math.cos(radians)and the value of theycoordinate isRADIUS * math.sin(radians). This has been explained in the previous section.And once we have the
xandycoordinates, we can go ahead and place the cube usingplace(x, y, 0). We don't need to change thezcoordinate to make a simple ring.
In the next lesson, we'll try to color this ring and in the process learn about the modulo operator.
© 2024 Abhin Chhabra | Sitemap